Monday, October 31, 2011

Halloween EOTD

October being my favorite month of all year, its no wonder I have been such a very bad blogger.

*BAD GEN*

 Anyways, I am here now to show off my Halloween eyeshadow of the day look. It is SO colorful and dramatic and daring, I created this look with some of my favorite Sugarpill products of all time.
SO...enjoy some pics!

 These are the Sugarpill Products I used:
  • Midori (pressed grassy green)
  • Tako (pressed super white)
  • Poison Plum (pressed deep & bright purple)
  • Bulletproof (pressed deep matte black)
  • Dollipop (pressed super hot pink)
  • Absinthe (loose acid-ee lime green)
  • Afterrparty(pressed electric shimmery blue is also pictured but was not used in this look)
The Sugarpill Palette shown in this picture was the discontinued "Cold Heart Palette." I am SO glad I got one before they were discontinued. I ordered the burning heart and cold heart so I could double up on poison plum. I ordered midori and dollipop singles instead of the sweetheart palette.


In the picture above I show everything that I used to:
prep my lids, define my bows, create the precise line
& line my eye-lid/waterline/tight-line
  • Scotch Tape
  • Urban Decay Eyeshadow Primer Potion Original (I re-potted the product after the original "genie-esque bottle it came in snapped in half)
  • NYX Jumbo Pencil in Milk
  • MAC Impeccable Brow Pencil in Blonde
  • MAC Fluidline in Blacktrack
  • Urban Decay 24/7 Glide-On Eye Pencil in Zero
  • NYX Fabulous Lashes in Nostalgia #128
  • Maybelline Falsies Volum' Express Mascara in Black Drama

 In this picture I will show you The Body Needs products I used:


These are the products I used on my Face:

  • Revlon ColorStay in 240 Medium Beige
  • Revlon Beyond Natural Smoothing Primer
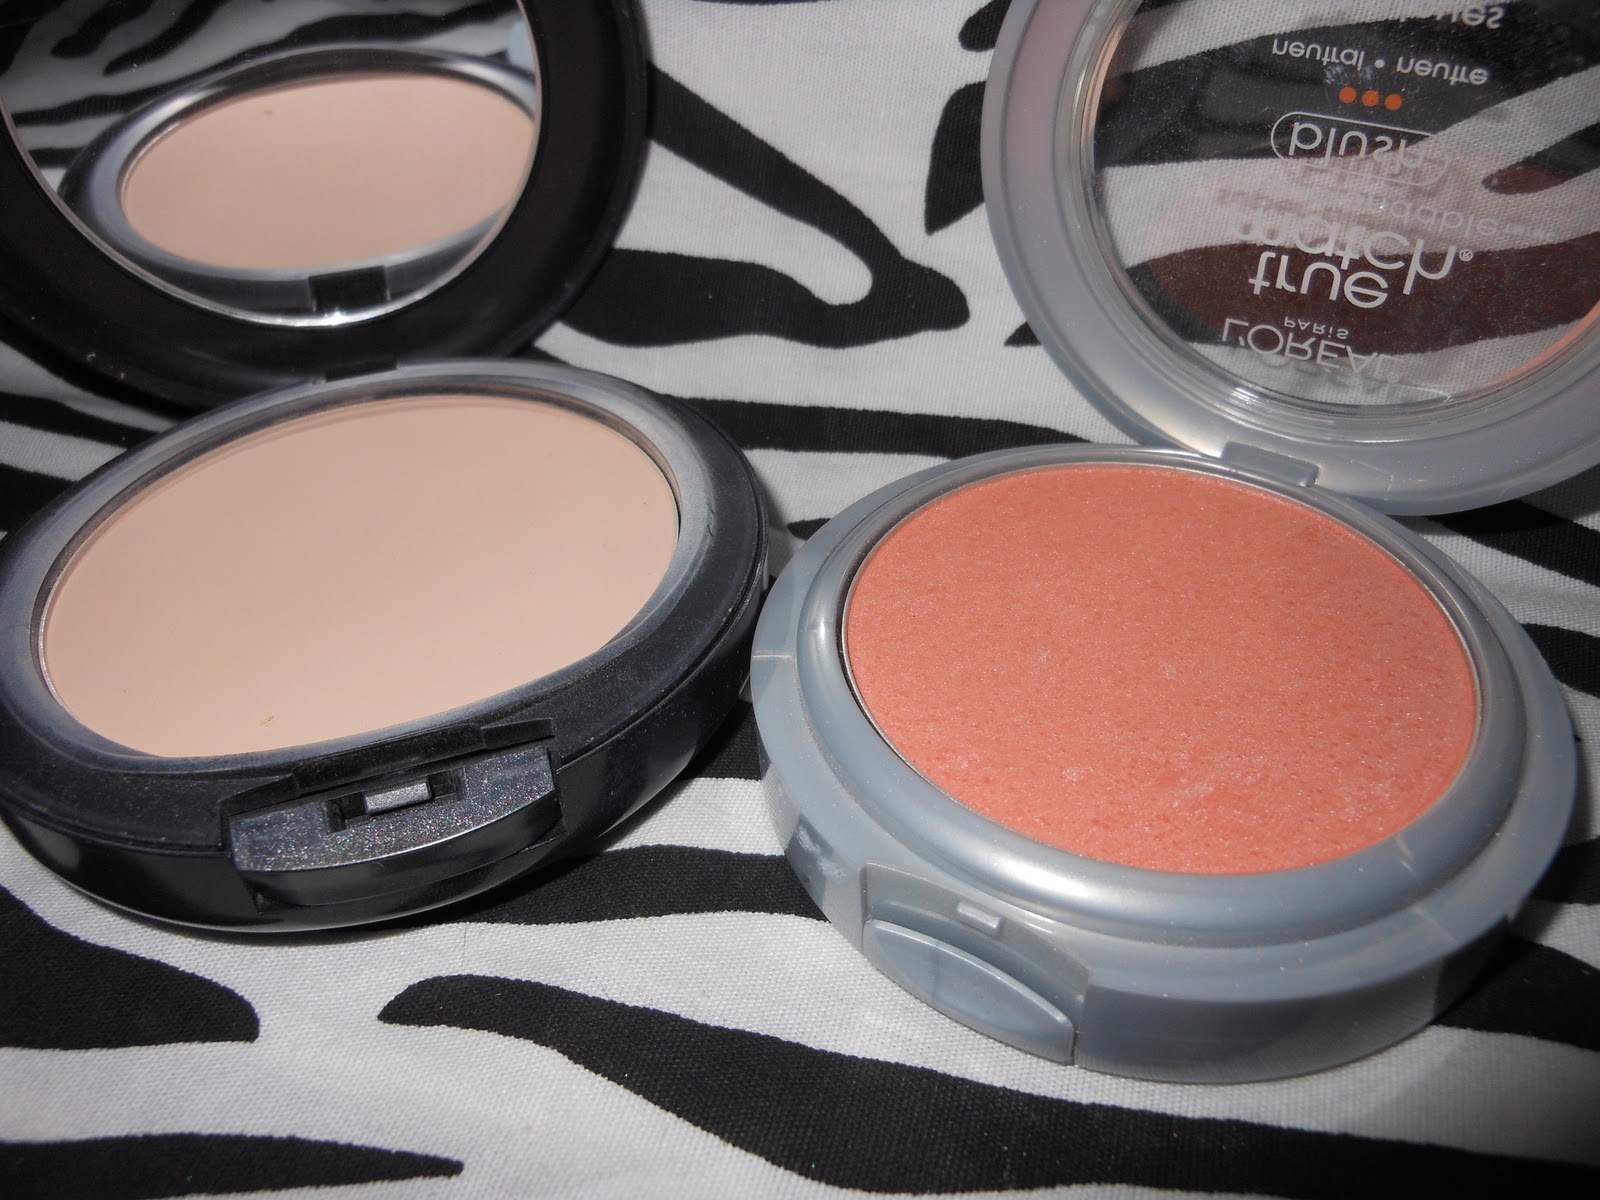
  • L`Oreal True Match Super-Blendable Blush in  N 3-4 Innocent Flush
  • MAC Studio Fix Powder in NW20


Here is a picture of my eye close up. I placed the tape at the end of my eye, lined up with the natural line on my bottom lash-line. I then applied my UDESPP on my lid, followed by a generous application of the NYX pencil in milk. I then patted the Midori on just my lid. Over that I smoothed on a layer of the Absinthe. Then from the outer corner I started to blend in the Poison Plum across my crease, followed by a light application of dollipop to blend it out to my brow. I then went in with the Bulletproof and applied that to the very corner down slightly into the midori/absinthe. I then put a tiny bit of the nyx milk under my brow/ inner corner of my eye to apply Tako under my brow and Shimmers Green in my inner corner. I applied the Orchid In Violet the blend the poison plum into the tako and blended the inner corner up just a bit. The last steps were to fill in my brows, line my eyes on my lid with the MAC Blacktrack, and line my waterline/tigh-line the top lash line with the UD pencil in zero. Last but not least, I added the lashes and blended my natural lashes in with the falsies mascara.


After I finished my eyeshadow, I removed the tape and proceed with my usual face make up regimen. I start with the Revlon smoothing primer, and apply a very thin and light layer. I then follow with my foundation (revlon colorstay), stipple it on with my foundation stippling brush. After that I brush on a light layer of the blush in passionate kisses and blend some of the true match blush over for a more flushed/shimmer look. Lastly, I set the remaining spots of my foundation with the MAC studio-fix powder.

As you can see in the next two pictures, I put my vampire fangs in that were used for my "Dr. Acula" costume. None of my halloween party pictures showed them off very well, so I decided to show them off here!

I hope you all enjoyed this post! If you have any comments, questions or suggestions
(weather for the look of future blog posts)
...leave it in a comment below!
Stay Doll, Lovelies!

Saturday, October 1, 2011

My Dark Passenger

I'm not sure how many of you readers are Dexter fans, but for the few that might be, YOUR AWESOME!! I only say that because if your a Dexter fan, you totally understood the title of my post. Dexter is a show on Showtime , its about a Blood Spatter Analyst/ Serial Killer named Dexter Morgan. While after seeing a look that inspired me, I decided to take it my own, horrific and twisted route. I named this look after the blood lust Dexter has for being a Vigilante, which he refers to as his "Dark Passenger". So, now that we are all on the same page, check it out:


Props
Framing Hammer
Fake Blood


Nail Polishes used
Base:
Sally Hansen Complete Salon Manicure in "Without a Stitch"
Spatter(In this order):
Wet n' Wild in Nail Color "Black Creme"
Wet n' Wild Megalast Nail color in "Haze of Love"
Sinful Colors in "Ruby Ruby"
Top Coat:
PRO-FX Complete 3 Top Coat, Base Coat, Nail Strengthener


In order to create the "spatter" effect, I used a coffee straw, cut into three pieces for the three colors. 


After Applying the base, I used the coffee straws by dipping them into the polish, then blowing them on my nails, one color/nail at a time. For the base and the top coat, I wanted to use something more study as far as quality to retain the look as long as possible (or until I felt like taking it off), but for the spatter colors, I used inexpensive brands because they would be covered with top coat anyways. It took about 20 mins and made a giant mess (both on my hands and on the paper towels I laid down).

MAKE SURE TO MESS PROOF YOUR WORKING AREA IF YOU ATTEMPT THIS EFFECT- ITS MESSY!!!!

Really, I almost threw in the towel half way through because I wasn't up for cleaning up the big mess I was making. This was my first attempt with making a spatter look, and having done it once now, there are a few things I will be doing different next time to make it less messy (like tapping my fingers off and getting smaller straws). I hope you enjoyed this scary look that would be ideal for a gorey halloween look. Make sure to follow my blog! 
Stay doll. Lovelies!

Thursday, September 22, 2011

EPOCH PHAIL!!!

Something happened to me a few weeks ago that I hope never happens to anyone else, frankly, because its super not cool. On this sad day, I was startled by something, and I dropped my 
Ben Nye "Ice" pigment. R.I.P. lost product.

It landed upside down on my sugarpill palette...
(which allowed me a way to salvage as much as possible)


FML!!!
T_T

Saturday, September 10, 2011

Never Die Purple Eye

Oh my gosh! 
If you were in Barstow the last few nights, you would know we have been going through a HUGE thunder/lightening storm. Watching from my window, I get a glimmer of inspiration. The clouds were dark and the lightening would cut through like a warm knife to butter. The sky would light up this brilliant violent VIOLET! I loved it...so I re-created it. Im keeping this short and sweet, only one pic, so I hope you enjoy!! 

Products Used:
Sugarpill Poison Plum, Tako and Paperdoll
MAC Fluidline Blacktrack
The Body Needs Blackened Violet
Ben Nye Ice

Stay doll, LOVELIES!!!


Monday, September 5, 2011

Absinthe

Today is Labor Day, so with that being said, maybe I should WORK on getting this new look posted to my blog! This look was not only posted on The Makeup Bee by me but...BUT the page from makeupbee.com was re-posted by SUGARPILL COSMETICS on facebook and, AND, also re-tweeted by sugarpill on twitter. Thus far, that was one of the most exciting moments as far as my make-up work goes! I was super happy.

SO today I am posting my EOTD look from Sept. 3rd 2011. I'm posting it just a few days late becuase I went with a haul blog yesterday. I wanted to spread them out a little instead of posting two posts in a day. So on saturday (9/3/11) I was about to get in the shower. Being the OCD freak I am, I needed to lay out what I was going to wear after I got out. I went with some shorts and my favorite Sublime shirt. 


The bright green wording on it reminded me of one of my newest sugarpill purchases (which was still like 5 months ago). Sugarpill has this Loose Eyeshadow called "Absinthe". It's a yummy, bright, acid-ee green! It will have you seeing "Little Green Fairies" all day!

The products I used were:
-Urban Decay Eyeshadow Primer Potion Original
-NYX Jumbo Eye Pencil "Milk"
-NYX Jumbo Eye Pencil "Cottage Cheese"
-MAC Pigment "Vanilla"
-The Body Needs Pigment "Lemon-Lime"
-The Body Needs Pigment "Lemon Drop"
-Sugarpill Chromalust Loose Shadow "Absinthe"
-Sugarpill Pressed Shadow "Tako"
-MAC Fluidline "Blacktrack"
-MAC Impeccable Brow Pencil "Blonde"
-Maybelline Falsies Winged Mascara "Blackest Black"


Here are some pics of the look up close:


Creating this look was lots of fun and the colors were delicious! So until my next moment of brilliance, I leave you with this! Stay doll, LOVELIES!!


Sunday, September 4, 2011

Makeup Geek Haulage

Hey zom'b lovers! This is officially my very first Haul blog post! As you could probably tell by the title, its from the makeup geek online store. The haul contains products I got from two separate orders, just added them together becuase I was waiting to get my new camera and in the meantime I got more stuff from her store. The owner/creator, Marlena, is such (as far as I can tell from her videos) a very sweet person and she does EXCELLENT video tutorials. Everything is simple enough for even beginners to be successful in creating either gorgeous, edgy, colorful or neutral looks. So without any further adieu, lets get started!
The First thing I want to talk about is the brushes. She has her own line of make-up brushes. They are all very good quality brushes, very VERY reasonably priced for the product you are getting.  These are the ones I got:

-MUG Deluxe Foundation Stippling Brush
-MUG Crease Brush
-MUG SMall Crease Brush
-MUG Pointed Crease Brush
-MUG Deluxe Outer-V Brush
-MUG Stiff Dome Brush (MAC 217 Dupe)


Next we can start in with ALL the NYX products I got. I just want to mention something about the palette shown in the picture. The one I chose was very similar as far as colors to a Kat Von D palette I was looking at on Sephora's site, when I saw the NYX one I was pretty excited because I do enjoy the texture of their pressed shadows. Here is a complete list:

-NYX 10 Color Eyeshadow Palette "The Runway Collection" in Champagne & Caviar
-NYX Professional Makeup Puff
-NYX Pressed Shadow in Sahara
-NYX Pressed Shadow in High Light
-NYX Jumbo Eye Pencil in Cherry


What is next is the Ben Nye pigments I got. I have heard a lot about their pigments so when I saw that Make-Up geek sold samples of them, I ordered a couple to try.  The two I got were:

-Ben Nye Loose Pigment in Cherry Red
-Ben Nye Loose Pigment in Ice


Here is a swatched pic of the pigments (dry and with my homemade mixing medium)


AND Last but DEFINITELY not least...SUGARPILL!!!! YAY! *Applause in background* I simply ADORE Amy, and she has created a very beautiful monster when it comes to her Sugarpill Empire!! Some of the MOST brilliant colors, my fav. eyeshadow brand as of right now and just all around the CUTEST stuff on the market! Sugarpill has solely made it my personal mission to make it to IMATS 2012 JUST to visit that booth and meet Amy! (OK STALKER!) LOL! I was on make up geeks store page and noticed she not only sells the Chromalust Loose Pigments, but she also samples some of them out. With that said, I picked up a few of them that I didnt already have the full sizes off. Here is a list of those:

-Sugarpill Chroma Lust Loose Shadow in Magentric
-Sugarpill Chroma Lust Loose Shadow in Paperdoll
-Sugarpill Chroma Lust Loose Shadow in Starling
-Sugarpill Chroma Lust Loose Shadow in Magpie


 Here is a swatched pic of the pigments (dry and with my homemade mixing medium) 


I hope you all enjoyed as much as I did, I love having new things to work with, makes this ZoMbEa HAPPY!! Stay doll, Lovlies!

Sunday, August 28, 2011

A real class act...

Its that time of the year again, school is back in session! Exciting for me becuase I do not have to worry about classes, for now. I figured for my first "Look Blog", I would do something school appropriate. This look is complied of neutral shades, and is very wearable for school or work. Its a look that I have been trying for a couple days, and I finally think I have got it down, finally! This look would also be perfect to pair with red lips for a classic pin-up look. I hope you enjoy dolls!


For my face, the products I used are: 
Revlon Beyond Natural Smoothing Primer
Revlon Colorstay Foundation
MAC Studio Fix Powder
The Body Needs Blush in "Passionate Kisses" 


 For my eyes, the products I used are: (in order from first to last)
Urban Decay Eyeshadow Primer Potion Original
NYX Jumbo Pencil in "Milk"
NYX Eyeshadow in "Highlight"
NYX Jumbo Pencil in "Cottage Cheese"
Maybelline Eyeshadow in "Made for Mocha"
NYX Eyeshadow in "Sahara"
MAC Fluidline in "Blacktrack"
Maybelline Falsies Mascara Winged in "Blackest Black"
 Brows: MAC Impeccable Brow Pencil in "Blonde"

 So all in all...That is pretty much it. This look is simple, classy and tasteful. Good for many occasions and very wearable. You could also switch the colors out for silvers and blacks to create a more dramatic/night time look, great for a night out!
Once again, I hope you enjoyed and if you have any questions of comments, PLEASE POST THEM!!

Love, Peace and ZOMBIEZ...


 Hehehe...IM SILLY!!